If you want to further secure your hosting account, requiring an SSH key upon login is one of the best ways to do so. Setup for SFTP keys will differ depending on the FTP client you are using, but today we’ll go over how to activate additional security measures for your account via FileZilla.
How to set up SFTP keys for FileZilla
Step 1: Access the FileZilla site manager
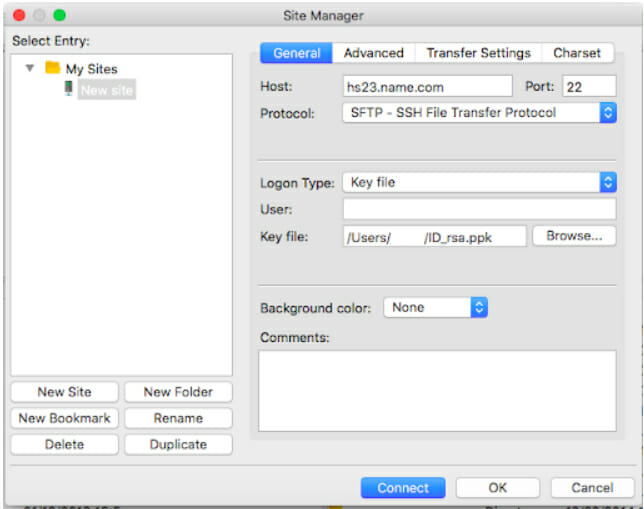
Start by opening the FileZilla client and navigating to the Site manager. Add your particular hosting server as the host and type “22” as the port. Next, select SFTP-SSH File Transfer Protocol from the Protocol drop-down menu.
Step 2: Set up an SSH key
Now, you’ll be able to secure your account by requiring an SSH key for access. Select Key file from the Logon Type menu, then enter your cPanel username for the User. Once that information has been entered, you can upload the Private Key file that you should have downloaded earlier. If you need help figuring out how to download that file, refer to the tutorial here.

Once all of the information looks something like this, click Connect.
Step 3: Convert the key file
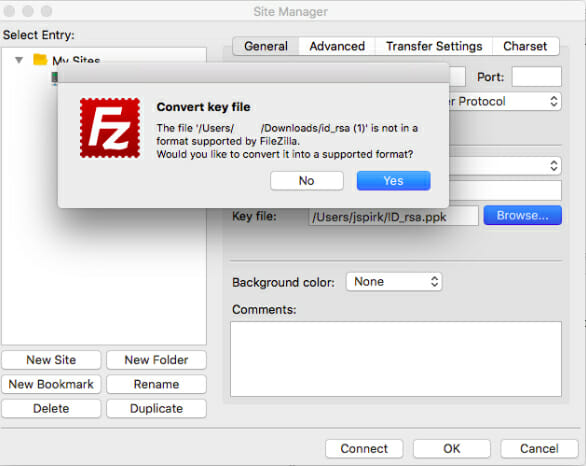
Next, you’ll get a pop-up message asking you to convert your key file to a supported format. Click Yes to continue.

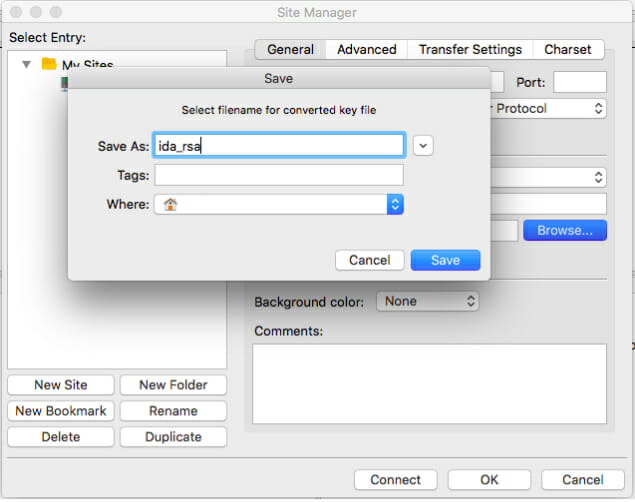
You’ll be asked to select a new name for the converted file. Type in ida_rsa, then click Save.

Step 4: Enter your SSH key password to complete setup
That’s it! As you continue through the process, you’ll be prompted to enter a password a few times. This is the password that you created while setting up your SSH key—which is why it is important to memorize it, store it in a password protected client, or write it down somewhere safe.
