If you’re a domain investor, someone who manages domains for clients, or you just have a serious domain addition (it’s OK, you can admit it), it can be difficult to find the domains you need in a giant, unorganized list. Creating and adding labels to the domains in your account makes it easy to find and organize the domains you’re looking for.
How to add labels to the domains in your Name.com account
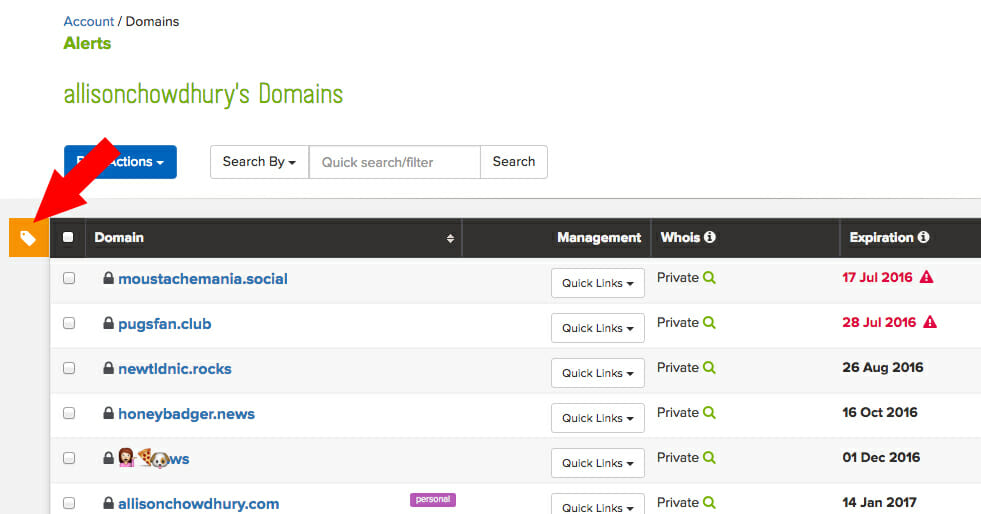
Start by logging into your Name.com account and navigating to the My Domains section under the My Account tab. In the upper lefthand corner, you’ll see an orange icon with a tag image on it. Click it to bring up the My Labels sidebar.

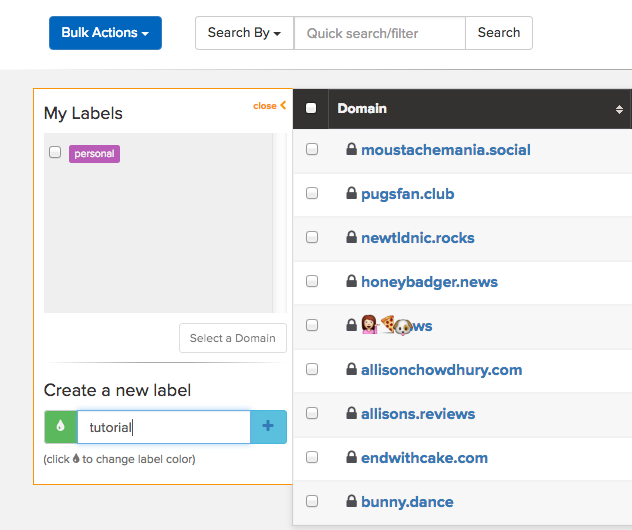
As you can see, I’ve already created a “personal” tag to label some of my domains. But now, I’ll create a “tutorial” tag by typing it into the text field and using the colored drop tool to choose the color for the tag label. Press the plus (+) sign to create the label.

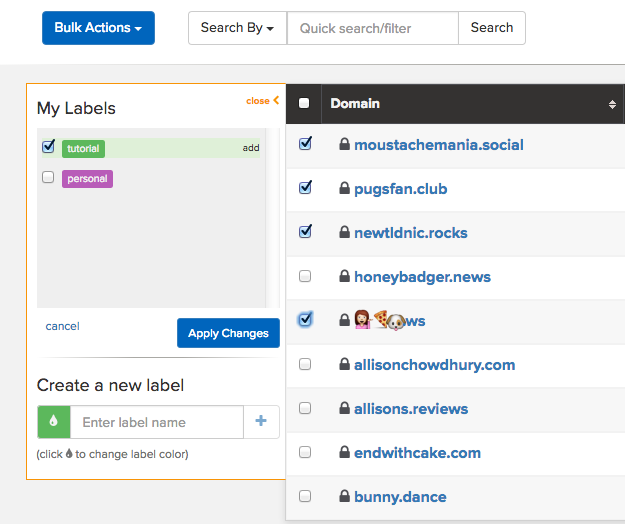
When the tag has successfully been added, it will appear under the My Labels section.
Next, you’ll need to add the tag to your domains. Checkmark the box next to the tag you want to label your domains with, then checkmark the domains that should be tagged. Press the Apply Changes button in the sidebar to add the labels to the selected domains.

Once the labels have been added, they will appear on your domain list. Whenever you need to pull up domains with a certain label, click on the label you’re interested in to see the entire group, or search by label in your domain list.

Keep in mind: Once created, labels cannot be deleted. Domains can be removed from the label category, and sorted under new labels, but your old labels will permanently exist under your My Labels list.
Want more tutorials, promo codes, and domain news delivered straight to your inbox? Sign up for the weekly Name.com Blog Digest.
